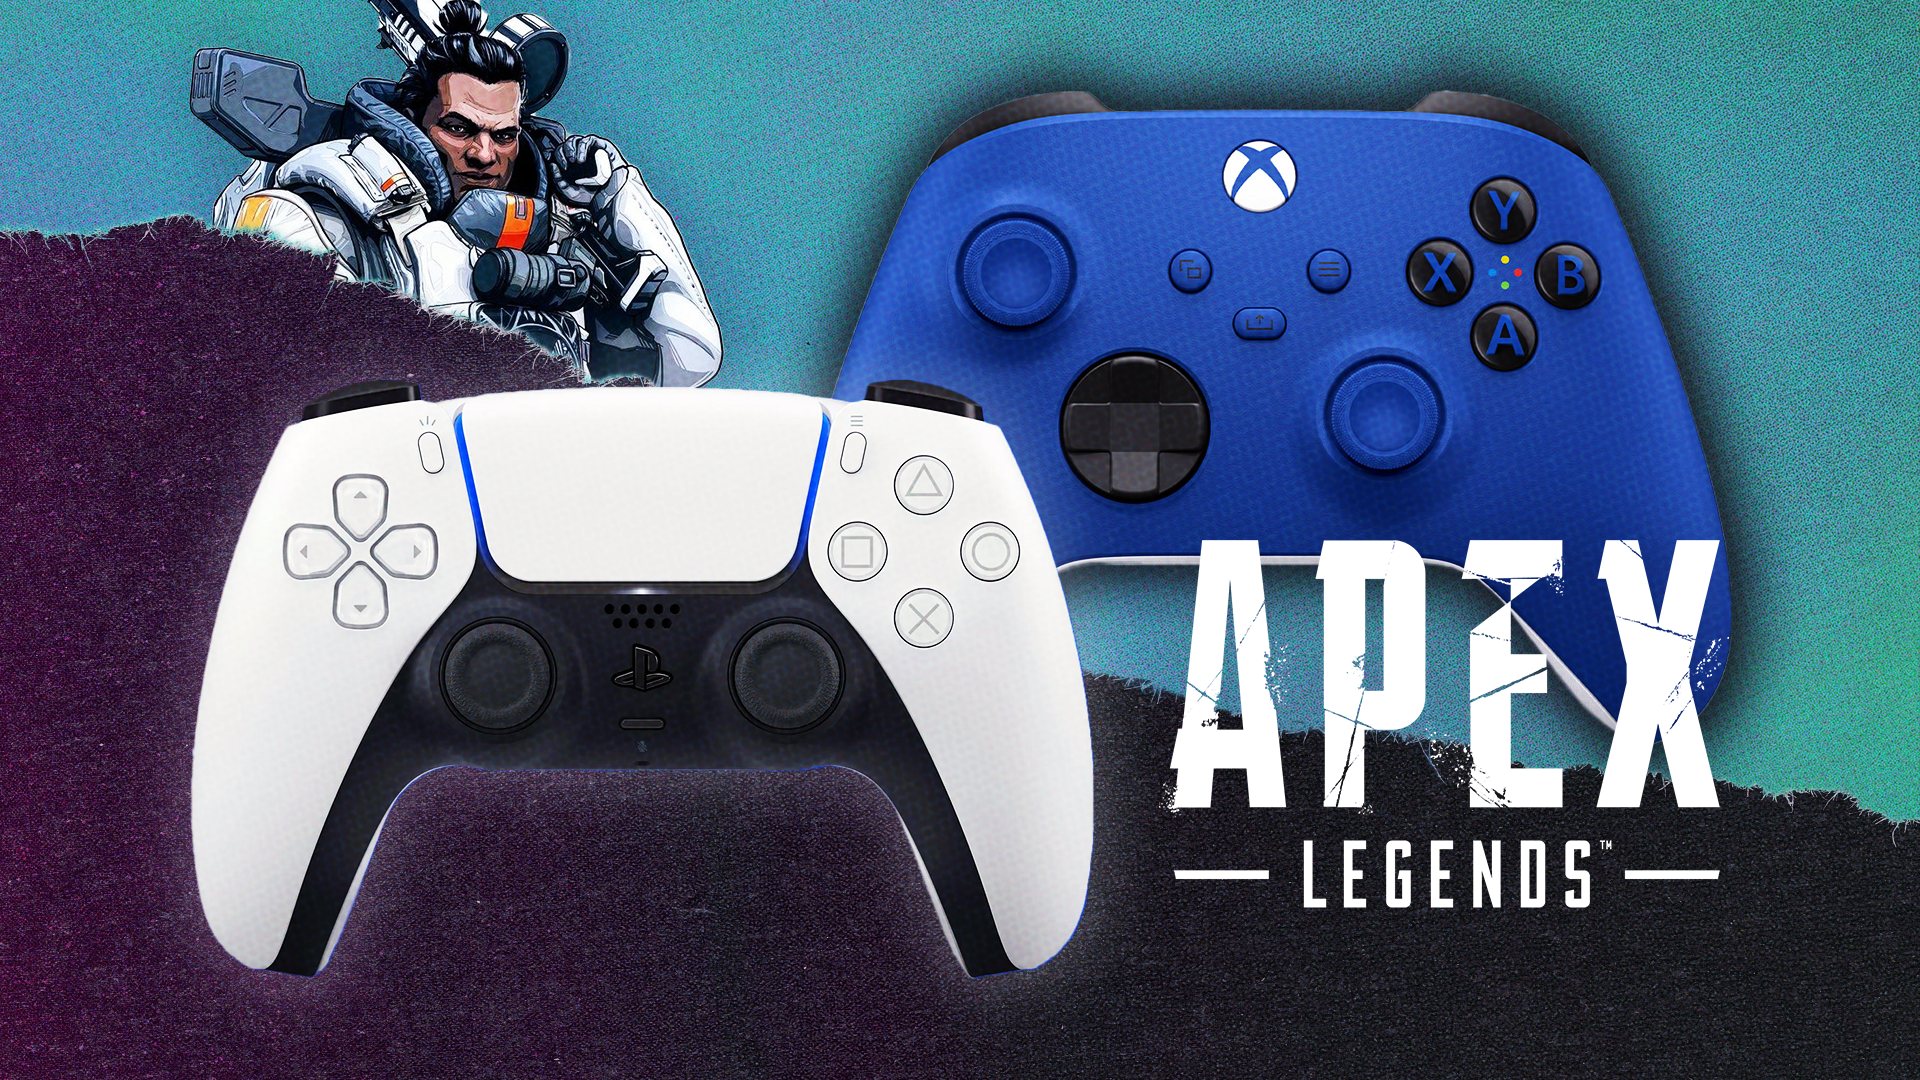
The Ultimate Controller Settings Guide for Apex Legends
With all the talk about aim assist being the ez button to stack up wins on Apex Legends, several players may be clamoring to jump on the sticks and start fragging. They may be in for a rude awakening as they quickly realize that something looks or feels off in the game. In this guide, we will review all the settings you’ll need to tweak to get the most out of your controller.
An Intro to Controllers
It is no secret that controller use has grown in popularity in Apex Legends. In addition to the player base on console, more and more PC players are gravitating towards the controller. We have also watched as a huge swathe of mouse and keyboard Pro players have changed their input to control, including names like ImperalHal.
Are you wondering why?
Once mastered, the controller input is extremely powerful when fighting up close and personal. In particular, the aggressive meta and incredibly strong set of SMGs in Apex have made close-range fighting much more common, strengthening the case for controller.
We would be remiss if we did not note that both input types have pros and cons but have one thing in common; you can maximize your potential with the right settings. This will not be as simple as finding a controller Pro and simply copying their settings exactly, you will need to understand what works for you and why you use a certain setting. First, we’ll look at some game-specific settings before diving into the controller-oriented options.
FOV and Graphics
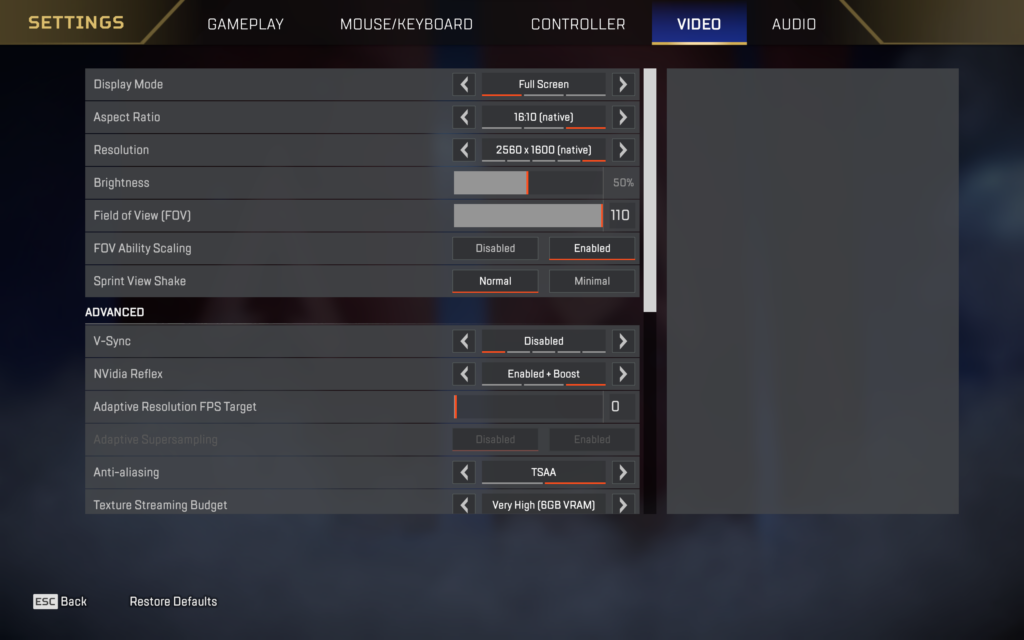
We will start with your Field of View or FOV settings. This can make a huge difference to your gameplay experience, affecting what you can see and your aim. The default setting is 90, but most Pro players are playing at 110 FOV which is the maximum setting. The main reason they prefer this is for the information that it provides, as the more that you can see, the better. Especially with the audio in Apex Legends being hit or miss on occasion.
The most noticeable drawback to the higher FOV setting is the aim, especially at longer ranges. The higher your FOV, the more zoomed out you may feel, which means that enemies who are further away will appear significantly smaller. Keep in mind that we had established that the controller shines in close-range engagements, so this would be one of the cons we had referenced above.
Ultimately, the Pro players have weighed the options and felt that the trade-offs for controller input were still worthwhile, and the illusion that you’re running significantly faster sure doesn’t hurt.
As we look further into your display settings, you have the option of leaning towards high-quality settings to increase the visuals aesthetically, or you can lower the settings to increase your overall performance. We cannot deny that Apex Legends looks gorgeous with every visual option maxed out, but you are going to need a legitimate supercomputer to maintain competitive frame rates consistently.
Dialing the settings back to provide the best performance will ultimately give you the best opportunity to perform in combat, especially when you pair a high refresh rate monitor with the mouse and keyboard inputs. For controllers however, there is a bit of a different story.
The input delay which currently exists for controllers performs best at 144 FPS / 144hz. This means that even if you have a 240hz top-of-the-line monitor, we suggest limiting your refresh rate to 144hz to minimize the input lag.
A good rule of thumb is to turn down every setting that you can deal with while still enjoying the look and the feel of the game. One last setting we’d recommend adjusting would be disabling vsync and enabling the Nvidia Reflex option if available. The rest will come down to your personal preference.
Controller Settings
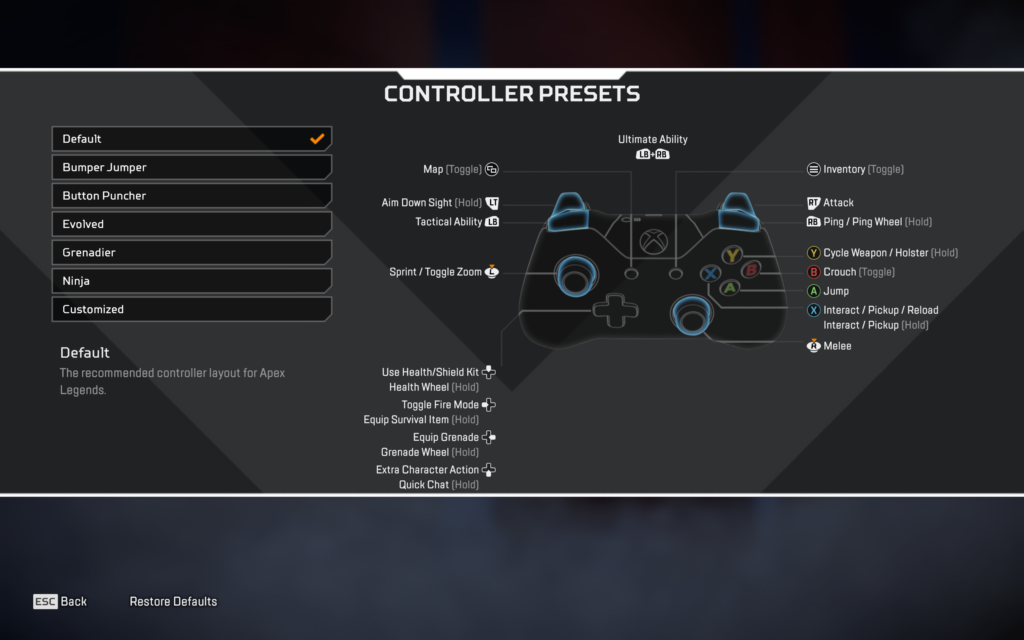
Next, we are going to move on to the controller-specific setups. First of all, we’re going to explore the controller button layout. The default layout doesn’t reliably allow for some useful techniques such as crouch spamming which has nearly become essential in Apex Legends. Some of the other layouts lend themselves to those requirements better, but each one will have its own flaws. Some layouts may also depend on whether your controller features paddles or not, so keep that in mind as you look them over.
If you have already developed muscle memory in another first-person shooter with your controller, it would be worth it to look for a layout that matches the inputs you’re familiar with, as that muscle memory could transfer over. The most important thing to remember is that the layout has to feel right in your hands, so you may need to experiment to find the best results.
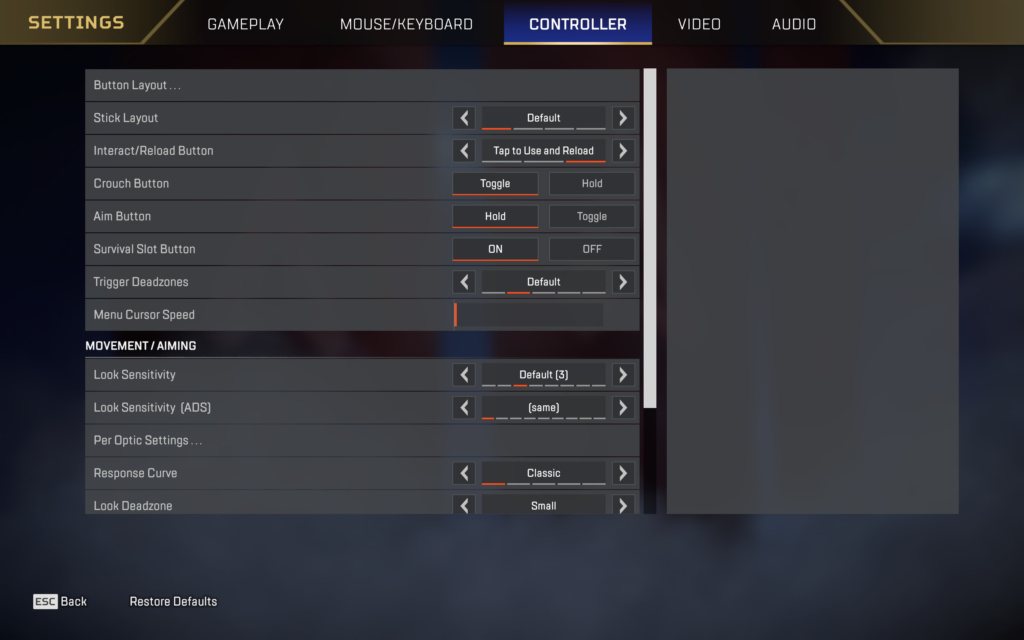
Now, we’re going to dive into the all-important response curve and sensitivity settings for your controller. This will mostly be advice and guidance, as there is a range of options to use and this is another situation that will come down to your personal preference, so focus on your own feelings on the settings rather than running to copy your favorite Pro’s.
Response curve affects how y our sticks will react to input, with classic being inspired by Respawn’s previous title Titanfall. You should try out all of the options here, though we would suggest Linear because it picks up the tiny movement and can be used much more precisely. This may be a bit more difficult at the entry level, but once you master it, you will significantly raise your skill ceiling.
For sensitivity, we have both the Non-ADS and the ADS sensitivities to work with here with values ranging between 1-8. Sensitivity is a crucial setting to lock in, as it can even control how strong your aim assist feels. Most Pro players use something consisting of either 3’s, 4’s, or a mix of both. Just like those Pros, you will need to experiment to find what feels best for you.
For faster movement, some players use 5-3, though they might not actually use one of these presets. This is because there are also ALC’s, or Advanced Look Controls. Using these ALCs will allow you to fine-tune your sensitivity, which is more complicated but provide the most control over the feel of your controls. We will warn you though, ALCs may look intimidating as you get started.
Finding the right ALC’s can be tough, and sure, there are Pro player settings that you can copy, but settings like deadzone really require experimentation so you can find the best fit for your equipment. We would suggest aiming for a deadzone as low as you can go, with whatever value is the lowest that you need to eliminate any potential stick drift you may experience. It would be helpful to jump in the firing range and up the value by increments of 1% until you find the perfect value.
Outer threshold defaults at 3%, that value controls how quickly your controller will read maximum input, so start out by feeling the default option out to get your baseline. Now, the rest of the settings are up to you, try them out and see how they feel. You will not find the perfect set of ALC’s on your first outing, but experiment with them and find what feels more and more comfortable.
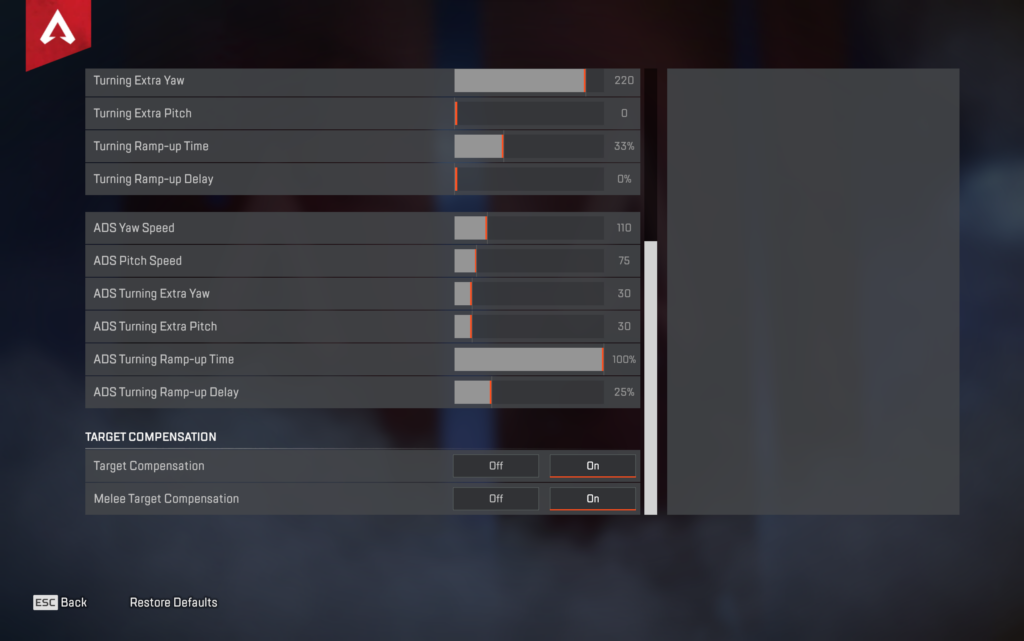
Response curve at 8 feels like classic, with linear somewhere between 0-3.
Yaw is your horizontal speed, and pitch is vertical. We always want to have the Yaw speed higher than the pitch. A good starting point is your current sensitivity multiplied by 50. So for example, 50×3 would give us 150 for our Yaw. For the pitch, set this to about 75% of whatever Yaw you just set and you’re off to a good start. From there, adjust and tweak the values to see what feels best. For all of the extra turning speed settings, we suggest putting these 0, but that is not a hard and fast rule. It’s worth experimenting with all of the settings, but some of them can be odd and potentially ruin your developed muscle memory.
One final note on your settings, a change may not feel perfect on the spot. Give each change some time to breathe before you write it off completely.
Aim Assist
Now that we’ve covered the settings, we will move through some quick-fire gameplay tips. First, we do want to say, controller players catch a lot of flack, lots of claims about aim assist, and built-in aimbot, and maybe we do need to accept that they do have an advantage over mouse and keyboard players in those close-range engagements. Understanding that, let’s play to those strengths.
Get your hands on a strong, close-range spray weapon, something like a CAR or a Volt. Get in people’s faces and get aggressive and reap the benefits of the controller. We will need to bear in mind that we still have some weaknesses, such as being unable to super glide, tap strafe, or wall bounce, just to name a few of the advanced movement options available that require mouse and keyboard controls. To account for that shortcoming, we will need to be aggressive, but we will still need to be careful and not get caught out in the open. A particularly vulnerable time will be when you are looting, as you’re standing dead still without cover. Remember to get in and out of loot boxes as quickly as possible to avoid punishment.
That was a lot of information to go through, try not to get overwhelmed by it and focus on tweaking one set of options at a time, then experiment with the new changes. Good luck out there, and enjoy that aim assist!