Killjoy Quick Guide – Abilities, Tips and Tricks for Beginners
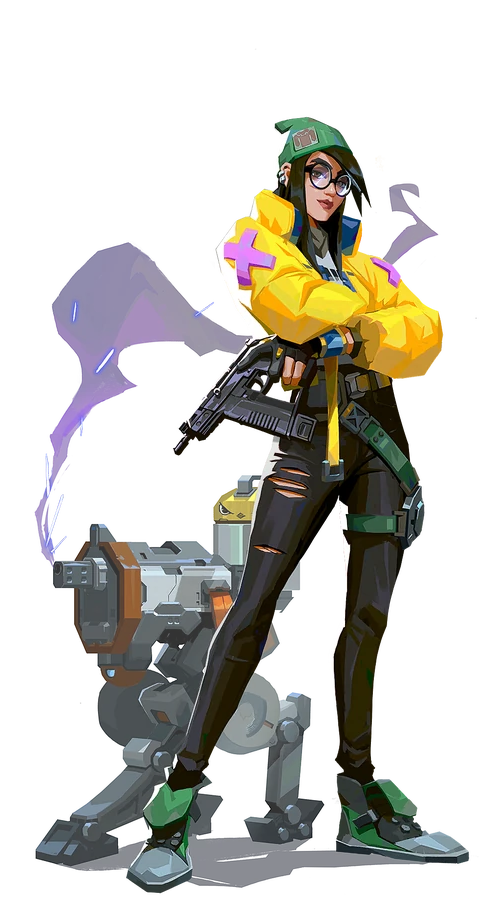
Agent Overview
| Archetype | Playstyle | Difficulty | Tier List Rank |
|---|---|---|---|
| Sentinel | Defender | Easy | S Tier |
Killjoy thrives in defensive situations where enemies are forced to push into her domain. Her Nanoswarm is fantastic for holding enemies back from pushing and even playing post-plant. Killjoy’s Alarmbot is a bit underwhelming but can detect enemies’ presence when they run into its range. Additionally, her turret is a great flank utility because, unlike other flank utilities, it can detect enemies as soon as they come into its line of sight. Finally, Killjoy’s ultimate is a fantastic way to force enemies out of their positions and away from its range. Killjoy can be a fantastic agent, especially in lower ELOs, but she requires some creativity to not be completely nullified.
Strengths
- Killjoy has the potential to be very strong in post-plant situations. This is due to her Nanoswarm grenades being activatable through walls and dealing high damage.
- Killjoy’s turret can be used to gather information about enemies pushing its line of sight. This makes them exceptionally great for watching the flank.
- Killjoy’s ultimate Lockdown forces her opponents to take action. They must either retreat from it or push up quickly to destroy it.
Weaknesses
- Killjoy’s ultimate can be destroyed by global ultimates. Examples of this include Brimstone’s Orbital Strike and Sova’s Hunter’s Fury.
- Killjoy’s normal abilities can be destroyed quite easily in general. One ability specifically is Nanoswarm. If this ability isn’t activated quickly, it can be detected by enemies when they’re close enough.
- Some maps don’t favor Killjoy’s ultimate because of their size. An example of this is Breeze’s A Site, where her ultimate struggles to perform its intended effect and can be avoided quite easily.
Skill Breakdown
Ability 1 (C) – Nanoswarm
Equip a Nanoswarm grenade. Fire to throw the grenade. Upon landing, the Nanoswarm goes covert hiding from the sight of enemy players until they come close. Activate the Nanoswarm to deploy a circle with a small radius which damages enemy players who are caught inside.
Ability 2 (Q) – Alarmbot
Equip a covert Alarmbot. Fire to deploy a bot that hunts down enemies that get in range. After reaching its target, the bot explodes, applying Vulnerable. Hold Equip to recall a deployed bot.
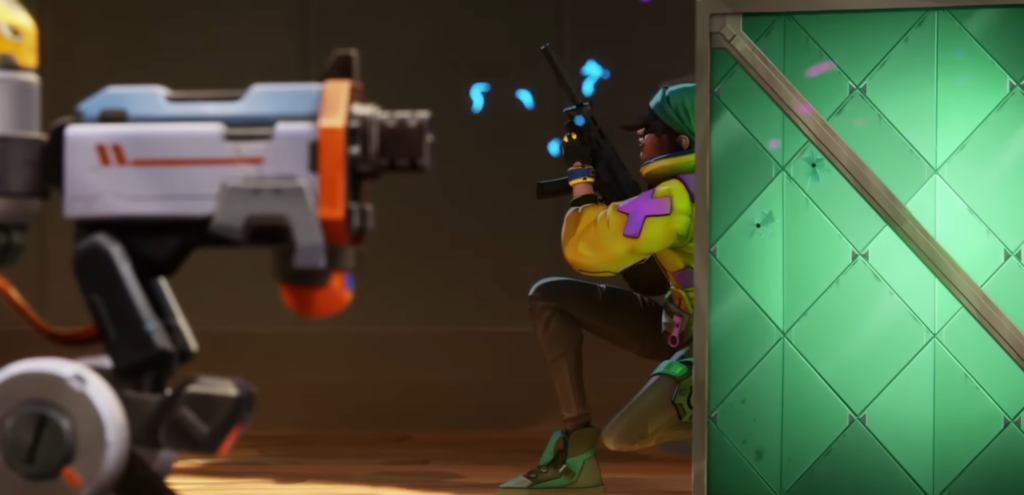
Signature Ability (E) – Turret
Equip a Turret. Fire to deploy a turret that fires at enemies in a 180-degree cone. Hold Equip to recall the deployed turret.
Ultimate Ability (X) – Lockdown
Equip the Lockdown device. Fire to deploy the device. After a long windup, the device Detains all enemies caught in the radius. Enemies can destroy this device.
Tips and Tricks
Tip #1 Cook the Spike!
Killjoy’s Nanoswarm grenades can be used to burn down the clock and force opponents into a bad spot during post-plant situations. As seen in this video, Killjoy plants the spike and places Nanoswarm grenades on top of it to force her opponents to react. Keep in mind that when using this ability and leaving, enemies can destroy them before defusing the spike. A more advanced version of this tip is to learn lineups to throw after the spike plant so that opponents cannot destroy them.
Tip #2 Never send an Alarm Bot to do a Turret’s Job
One of the best uses for Killjoy’s signature ability Turret is for flank protection. The turret does a great job at watching flanks, especially on a map like Ascent which has long choke points. This ability when used to cover the rear is actually really powerful, because unlike abilities such as Chamber’s Trademark, it can see opponents from far away and will give away their flank before they approach the ability. This provides you with more time to address the flank, and as an added bonus opponents will take a little bit of damage when destroying the turret.